Featured post

OCA Learning Log sampler

This is a sample of a learning log. It is designed for OCA courses, and is intended as a guide for students with the aim of showing the absolute minimum of things you have to do to set up a learning log, at the beginning of your course. Once done, you shouldn’t need to think about the structure again, you can just get on with enjoying the course. Unless you want to, in which case this is just the beginning, but remember, don’t over-complicate it, simplicity is all…

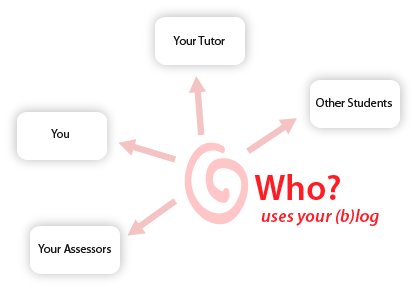
Your learning log is for you to organise and document your learning process – for yourself, your tutor, your assessors and to share with other students.  All of you are using it in different ways, so you need to organise it so that all of you can find what you want to read, quickly and easily.

you, your tutor, your assessors and fellow students

The first thing you need to do is read your coursebook. Then open it at the contents page, and use the step-by-step guide – How to set up an OCA Learning Log on WordPress (pdf) – to take you through the process of setting up your own learning log, based on this Sampler.  Also check ‘Tips and tricks’ on the sidebar to the right, and Tutors and assessors – what are they looking for?

To learn about using WordPress read the starter guide: Learn WordPress.com  Before you sign up for your WordPress blog, take 2 minutes to read Get started, and then Get acquainted, and read the rest if you want to!

And before you start to write your log, you really should find time to log onto the OCA Student Website and read OCA’s guides on learning logs: Introducing Learning Logs and Keeping an online Learning Blog – they will help you focus on what you are supposed to be doing!

WordPress.com is a fast moving world, and changes and improvements happen on a regular basis. Unfortunately, so do exhortations to buy extra stuff, so be wary. At time of writing, all of the things suggested above can be done without buying any extras. Please let us know if you notice things that are out of date.

December 2012

Research and reflection

This is the place for making notes on workshops, gallery visits, research into specific artists, analysis, and reflection.

It’s also the place for going off on tangents, and exploring areas that catch your interest, are relevant to your development – but aren’t quite on the syllabus!

Work on assignments

The preparatory work for an assignment should be documented here, in the coursework section.

The separate categories Assignment 1, Assignment 2, Assignment 3 and so on, are for the formal hand-in presentation notes that you will send to your tutor, tutor reports, and any follow-up work you may do responding to feedback from your tutor.

Use an image gallery for documenting work in progress?

These market pictures have been uploaded into this post and displayed as a ‘Gallery’.  Explore the options for using an image gallery to document work in progress. You can add descriptions and links to your images.

Read more in the step-by-step guide:  How to set up an OCA Learning Log on WordPress (pdf)

The step-by-step guide

How to set up an OCA Learning Log on WordPress

How to set up an OCA Learning Log on WordPress (pdf)

Contents

  1. Introduction – What’s this for?
  2. Setting up your blog in 7 steps
  3. Structure (most important bit)
  4. Dealing with images
  5. Adding menus
  6. Design and layout

This is a practical guide to setting up a learning log on the free blogging service WordPress.com, following the ‘OCA Learning Log Sampler’.  It is designed for OCA courses, and aims to cover the absolute minimum of things you have to do to set up a learning log on WordPress.com, at the beginning of your course.

Read on…  How to set up an OCA Learning Log on WordPress (pdf)

Tutors and assessors – what are they looking for?

Always be putting yourself in their shoes, and think, how am I going to make it easy for my tutor and assessors? If in doubt, then check with your tutor.

Illustrate your work-in-progress

When you are writing about your work you need to illustrate it with photos of your work, step by step. Your tutor will want to see, visually, how you reached your final piece of work.

Referencing between your blog and your (physical) artwork

If your work is physical rather than electronic – which it will be for most Fine Arts student – and you are sending your work in as canvases, A1 sheets, boxes of 3D materials, and so on, then you will need to find a clear and obvious way of referencing your actual artwork to the relevent blog posts.

Referencing between blog posts

For example – If you are writing a reflective piece where you want to compare a gallery visit you have written up, some research on a particular artist in a separate post, and a post documenting your own work experimenting with an idea… there are a couple of ways of doing this. You can simply link the url addresses of the posts you are referencing. You can use Tags to create a common keyword that links the posts together.  Think about it from your tutor’s point of view, the references need to be very obvious and the links need to work.

Your Assignments

If you are sending in your assignments via your blog – using the categories Assignment 1 – 5 you have set up – then keep it simple. Present it using just one blog post, which contains all the relative documents and coursework blog posts, as links. This way, your tutor knows where to start, and where to find everything that’s relevent. When you have received your feedback from your tutor, you can add the tutor report, and if you do any follow-up work, you can add links to this too.  So, by the time you get to the end of your course, and are thinking about assessment… then you can find everything too.

But remember… a Learning Log is:

  • a personal record as well as an element of work for formal submission for assessment
  • a form of self expression, often developing into a significant piece of work
  • something to help you plan, develop, reflect upon and collect evidence of your learning and skills
  • a tool to encourage you to think carefully about your learning
  • used to record what you have learned, experimented with and thought about
  • a way to help your tutor see what and how you have learned
  • organised in a manner which suits you and your tutor and is appropriate for assessment
  • organised how you wish, can look neat or dishevelled – as long as it’s legible!

Assignments 1-5

The separate categories for Assignment 1, 2, 3 etc are where your tutor and assessors will look for the presentation of your assignment, with links to your finished work, tutor reports and any subsequent follow-up work. You may not be intending to submit your work for assignment in this way, however it’s still worth setting up these categories, as you’ll find it really useful when you’ve finished your course, and are preparing your work for assessment.

Adding images – the path of least resistance

This is a simple way to upload images and display them in your post.  Add your text first and update your post to save it. Then, add your images one at time underneath your text, and make sure there is a clear blank line between your text and image, and between all subsequent images.  If your images are smaller than about 500 pixels, then in the ‘Alignment’ dropdown (bottom right corner in the picture above) select ‘Center’.  This way you should get your text and images nicely spaced.

Read more in the step-by-step guide:  How to set up an OCA Learning Log on WordPress (pdf)

fence and foliage silhouette

Flower stalk silhouette

Telegraph pole